The Ultimate Henna for Hair Recipe, Hair Dye without the Chemicals
Posted on February 05 2014
Hair Dye without the Chemicals
I've been a redhead for over 10 years and in that time I've been just about every shade of red under the sun. I've used box dye, professional color and have even bleached every now and again. My hair has been through hell and back and never fell out (thank you hair!) I've done some crazy stuff to my locks over the years but when I became paleo 2 years ago I cleaned up my eating habits. ...then I started thinking about all the chemicals I come in contact with through my daily routine.
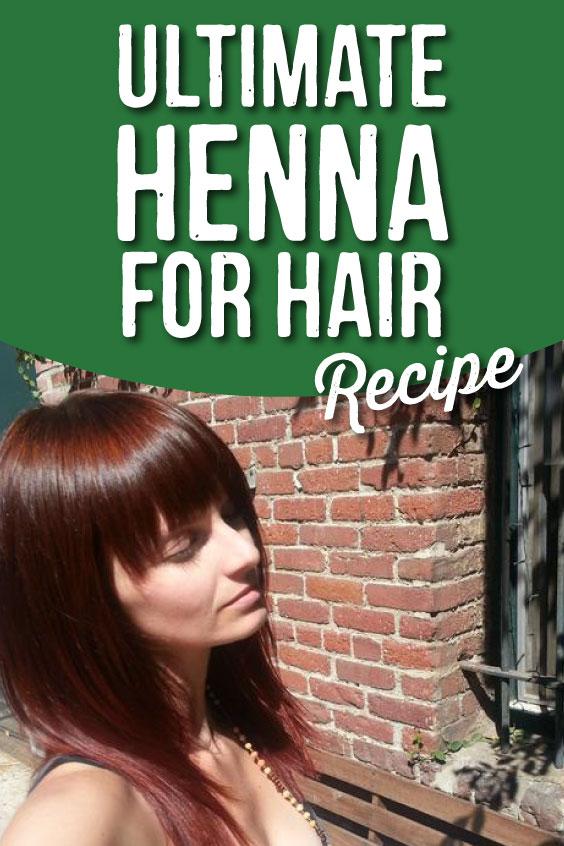
 <--- Hair color selfie, no filter
Have you looked at what's in hair dye? I mean you're putting this stuff directly on your scalp for hours on end!
I've also changed by lotions and was inspired to start the natural oral care company who's blog you are currently on. Check out our chemical free tooth paste and powder while you're here... shameless plug over, now on to the henna.
Not to mention the WAY hair color works. The long story short, hair dye opens up your hair cuticle and deposits dye molecules in the gaps. Think about it like this... if you took a christmas tree, turned it upside down so the branches flopped open, then stuck Christmas tree balls in the gaps, that is how hair dye works. Doesn't sound like a recipe for smooth shiny locks now does it?

Henna on the other hand is like adding a beautiful varnish to a nice pice of furniture. Henna is a transparent natural red dye molecule that coats each strand of hair like polish. It has a "watercolor effect" meaning the final color will be different for each person depending on their natural hair color. Much like the same red watercolor would look different if you painted it on different shades of paper, make sense? So unlike hair dye that makes your hair cuticle rough, henna actually glazes it, giving it a shinier thicker appearance.
 <-- see how each color looks different over black v white? This is what I mean by translucent watercolor effect.
I've been dying my hair with henna for about 2 years or so now and I've perfected my recipe. Dare I say this is the most paleo way to dye your hair, yes, I dare. Of course everyone's hair is different so your results may vary, always do a test swatch before doing your whole head!!!

<--- happy henna red head hanging with Claire from Flame to Fork
NOTE: Henna is a base and hair dye is an acid YOU CANNOT OVERLAP THE TWO!!! your hair will melt, supposedly. I waited 4 months after doing salon color to start henna. I tested a patch, my hair did not melt, so I did my whole head. Everything went fine :) ...But once you go henna you can't go back... until it all grows out.
ALSO, henna does not play nice with metal! It will turn green so DO NOT USE metal spoons or bowls.
The Ultimate Henna Recipe:
My details:
- I have bra strap length dark dirty blonde hair with some grey (GASP!)
- the bottom 6" was bleached back in the day while the rest has never seen a salon colorist.
- My hair is fine straight texture but I have a TON of it

You will need the following tools:
- A ceramic bowl ( no metal )
- A wood or plastic fork & spoon ( NO metal )
- A plastic hair dye bottle
- GLOVES (don't skip this one)
- Paper towels
- Saran wrap
- Plastic hair ties ( NO METAL )
- A comb with a pic ( NO METAL!! )
- Petroleum jelly (unfortunately, I have yet to find an alternative that works)
You will need the following ingredients:
- Henna: 150-200g (for bra strap length) Henna for hair, I swear by this brand of henna Ancient Sunrise (link).
- Decaf Coffee (a brand you like so you can drink the left overs)
- Optional Coconut cream or honey
- Optional Essential oils - any hair friendly favorites.
- I like: orange essence, rosewood, rosemary & lavender. They all do great things for your hair and scalp
 <---the powder IS GREEN
Step #1 Mix Your Mud!
You have to mix henna a day ahead of time it can take up to 12 hours for the dye to release, read more about dye release here
- Brew some strong coffee, I make a full french press which is about 4-5 cups
- Empty about 1/4 c of your henna powder into a medium sized ceramic or glass mixing bowl
- Pour in a little coffee and stir with a plastic fork, add more coffee until the goop is about the thickness of stirred yoghurt.
- Do step 3 again until you have mixed all of your henna powder to a soft yogurt texture. I tend to err on the side of "too thick" because you can always add more coffee but you cant take it out.
- Saran wrap the bowl and leave it on a room temp counter over night, or if you live someplace really cold, on top of your fridge
 <---- goop goes in there
Step #2 SCHLOP IT
- Give your henna mix a stir, seem like the right texture? Thick Yogurt. If it's too thick add a little more coffee. Too thin? Be ready for drips later.
- Add in your essential oils if you would like, they are not necessary. Add in 1 Tbs honey or coconut cream for some moisture, also optional. Give the goop one last stir.
- Ladle the goop into a plastic hair dye bottle, you can get them at any beauty supply store. You want to cut the nose of the bottle down a bit so the opening is drinking straw sized.
- you will have more than the bottle can hold, put the rest in a strong ziplock bag for later
Step #3 PREPARE YOUR BATHROOM
- If you have nice floors put an old towel down, you're going to drip henna the first couple times you do this.
- Put a dark hand towel on the counter so you have a place to set your squeeze bottle and dirty comb while you're not using it.
- Set out a roll of saran wrap and a roll of paper towels
- Grab your squeeze bottle, ziplock with extra henna and a pair of scissors. Put them on the counter towel.
 <---Harley Quinn is jealous
Step #4 PREPARE YOUR HEAD
- Henna is a VERY effective dye, it will dye anything it gets in contact with. We want red hair not red skin so we need to outline our hairline with Petroleum jelly. It's unfortunate that we have to put this nasty product on our skin but I have yet to find a natural alternative that is so effective at repelling the henna dye. If you know of one let me know! Put about 1" of the jelly on your skin around your hairline (NOT IN YOUR HAIR) and on your ears.
- Now get your comb and section your hair into 6" square sections, tie them loosely with a hair band. You will look a little like "Crazy eyes" from Orange is the new black.
 <---- "shllluuuurp" - henna bottle
Step #5 IT'S SHOWTIME!
- Pick a section of hair, I like to start at the front. Take it out of the hair band. Now use the pic end of your comb and part a 1/2" section of that hair.
- Lay a nice fat string of henna down the part, ahhh satisfying. Don't be stingy!
- make another part about 1/2" from the last one, comb the hair over that line of henna and kinda "squish" it in a bit. This will hold the hair out of the way and helps to get the henna all up in your roots.
- Do these two steps over and over until one section is done. When that section is done tie all the hair in back together (loosely) and do another section
- repeat until your whole head is done (Shout out to the boyfriend for helping me with this part)
- As you go along make sure to wipe up any henna that gets on your skin using a damp paper towel
- If you are just touching up your roots, YOU'RE DONE! If you are doing your whole head skip to step 6.
 <---- muddy noggin
Step #5 Mud your head
Now to cover the rest of your hair, this is the messy part.
- Choose a section and un-tie it, put on a fresh glove and squeeze a big handful of henna goop in your hand and squish it from roots to tip of that section until your hair looks like it's covered in caveman mud. Make sure all the hair is nice and saturated.
- Now twist that hair section into a little bun and tie it loosely with a hair tie
- Repeat until all the sections are little muddy cavewoman buns
 <---Saran princess Lea
Step #6 HURRY UP AND WAIT
- Grab the paper towels and tear off about a 2ft section, roll it long ways into a paper towel rope. Now wrap this around your hairline, it will help to catch any drips and save your clothes. That is if you are wearing anything, it's best to henna in your birthday suit to avoid ruining clothes. PRO TIP: put the paper towel rope behind your ears to further prevent dying your ears red by accident.
- Now take the saran wrap and wrap your hair into a big plastic beehive looking thing.
- How long to leave henna in hair? Once you have sealed off your entire scalp, wait for 2-3 hours.
- Some ideas to keep you busy: organize your computer files, paint your nails, take unflattering selfies and write a blog post about henna for hair or pretend you're a genie and grant imaginary wishes.
Step #7 WASH THAT MUD RIGHT OUTTA YOUR HAIR
- Alrighty, it's the time we've been waiting for! Grab an old crappy towel and turn the shower on. Take all the junk off your head and toss it. Hop in the shower.
- The best way to get henna out of your hair is to let warm water run through it for a few mins then use an inexpensive conditioner. Put lots of conditioner in your hair and massage it around, the conditioner will loosen up the mud. Surprisingly shampoo is not good for this, if you use shampoo you will still have lots of henna in your hair and really dry skin.
- Rinse
- Add more conditioner to your hair and massage in, brush with a wide tooth comb.
- Rinse
- Do this until the water runs pretty clear, now you can do a final shampoo and condition with fancy stuff.
- Dry your hair (with the old towel, trust me on this) Admire your beautiful shiny locks.
 <---end result, fierce red!
PRO TIPS
- Your hair will stain your pillow cover for a day or two, cover it with a towel. Also if you go to bed with wet hair, wrap a towel around your pillow for 3-5 washes.
- Your hair will have a natural scent. Some people LOVE the smell of henna, some think it's ok, Some think it smells like wet dog. The smell will go away after a week or so, it smells more when it's wet. When your hair is dry the only person who can smell it is someone who is all up in your hair aka the boyfriend. Let them know you are doing this so you don't get cancer, guilt trip city. The essential oils will help make the smell more pleasant.
- Why coffee? Well after trying lemon juice (fried my hair), Orange juice (sticky hair), Apple juice (worked well), I found out that coffee is pretty much the perfect PH for henna and the smell of coffee blends well with the henna and neutralizes it a little. You should note that caffeine can absorb through your skin so use decaf, or do your hair in the morning and be SUPER productive all day!
- Henna will be a different color on everyone! it's transparent remember! Even my hair has multiple shades of red since I used to bleach it. The ends are much more bright than my natural roots, I almost have an ombre effect. I used the same henna to do a strand test on le boyfriend who has dark brown hair and it looked... brown, but shiny!
I promise it's not as daunting as it may sound! The whole application process takes me 45mins or less now. The first time will be a little awkward but so is EVERYTHING the first time you try it (remember kissing in high school? yeah). I really enjoy my henna ritual now, I use those 2 hours to read or do a home spa treatment. My hair is in such great shape and I always get compliments on how shiny it is. Besides 2 hours is not a big sacrifice for your health.
Comments
0 Comments
Leave a Comment